
This is the second in a series of posts around deploying a Jekyll site to Azure storage.
Part one, which covers setting up the required hosting and deployment infrastructure in Azure, can be found here.
If you’ve followed along with part one, you should now have a site that is being continuously deployed to Azure storage and served on an Azure URL such as:
https://jekyllstg37711.z33.web.core.windows.net/
In this post, we will create an Azure DNS zone, an Azure CDN profile and endpoint, and deploy a function app to automate the SSL certificate request and renewal from LetsEncrypt.
Pre-requisite: Your own registered domain name.
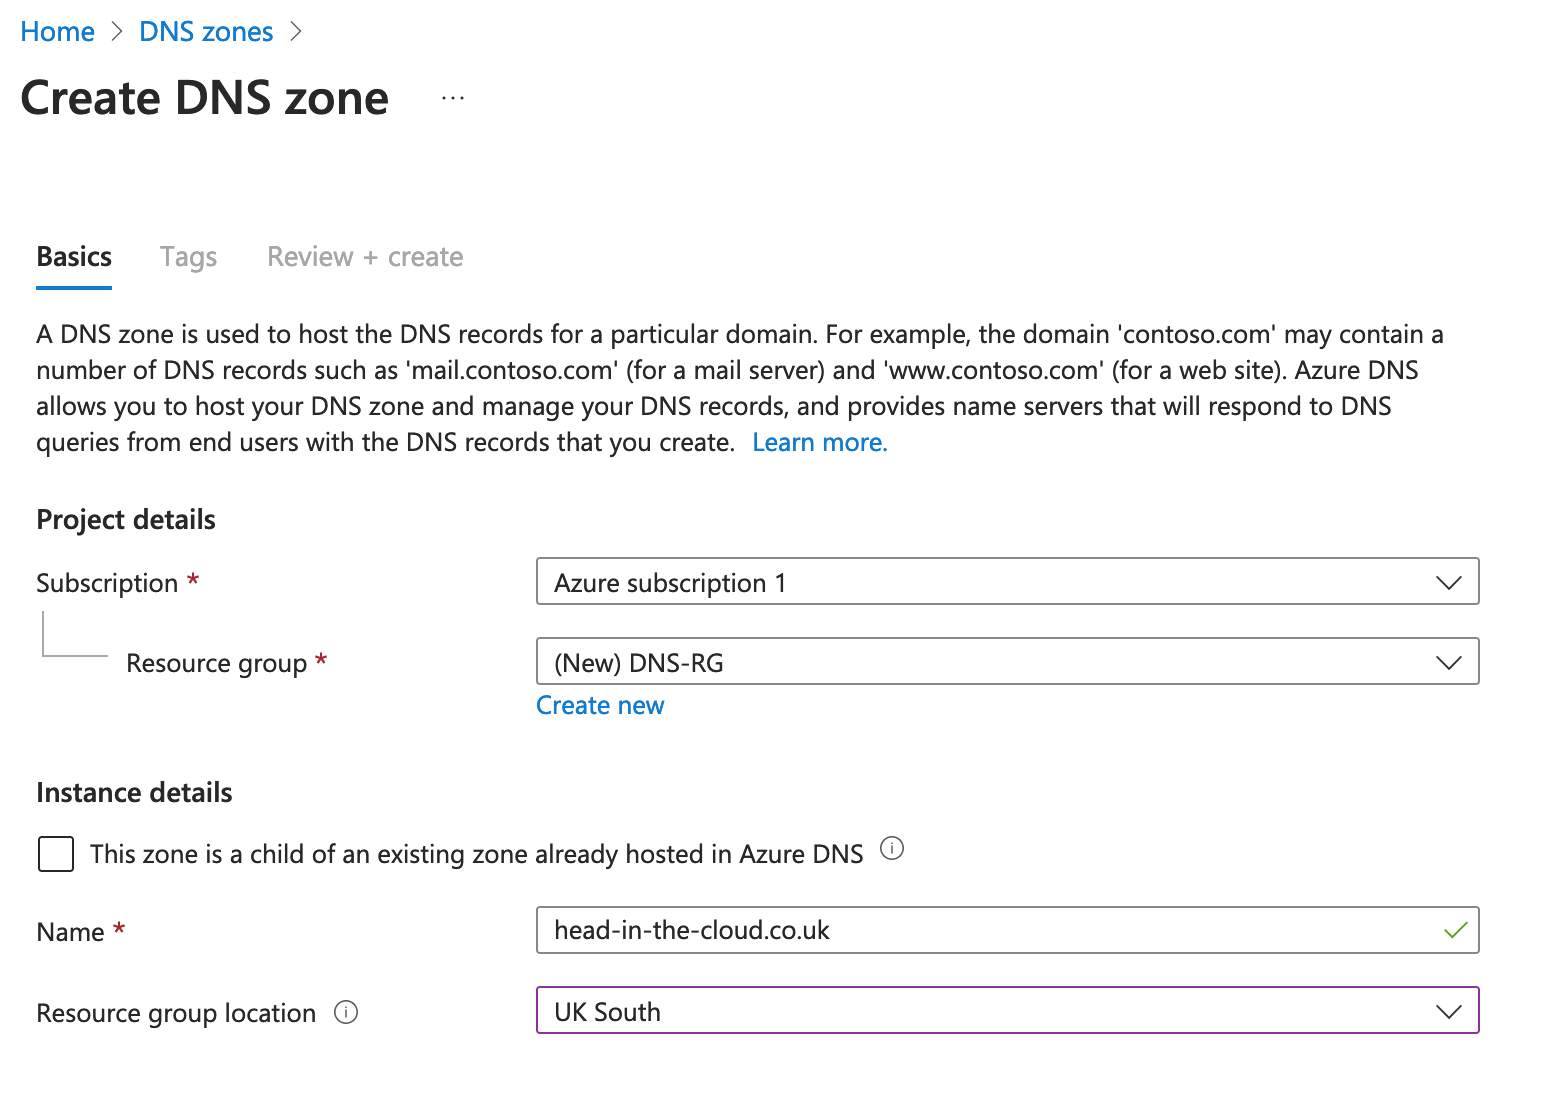
We start by creating a DNS zone in Azure and add then add the Azure name servers to your registered domain.
Create a DNS Zone in Azure:
Once deployed you’ll receive a list of Name Servers:
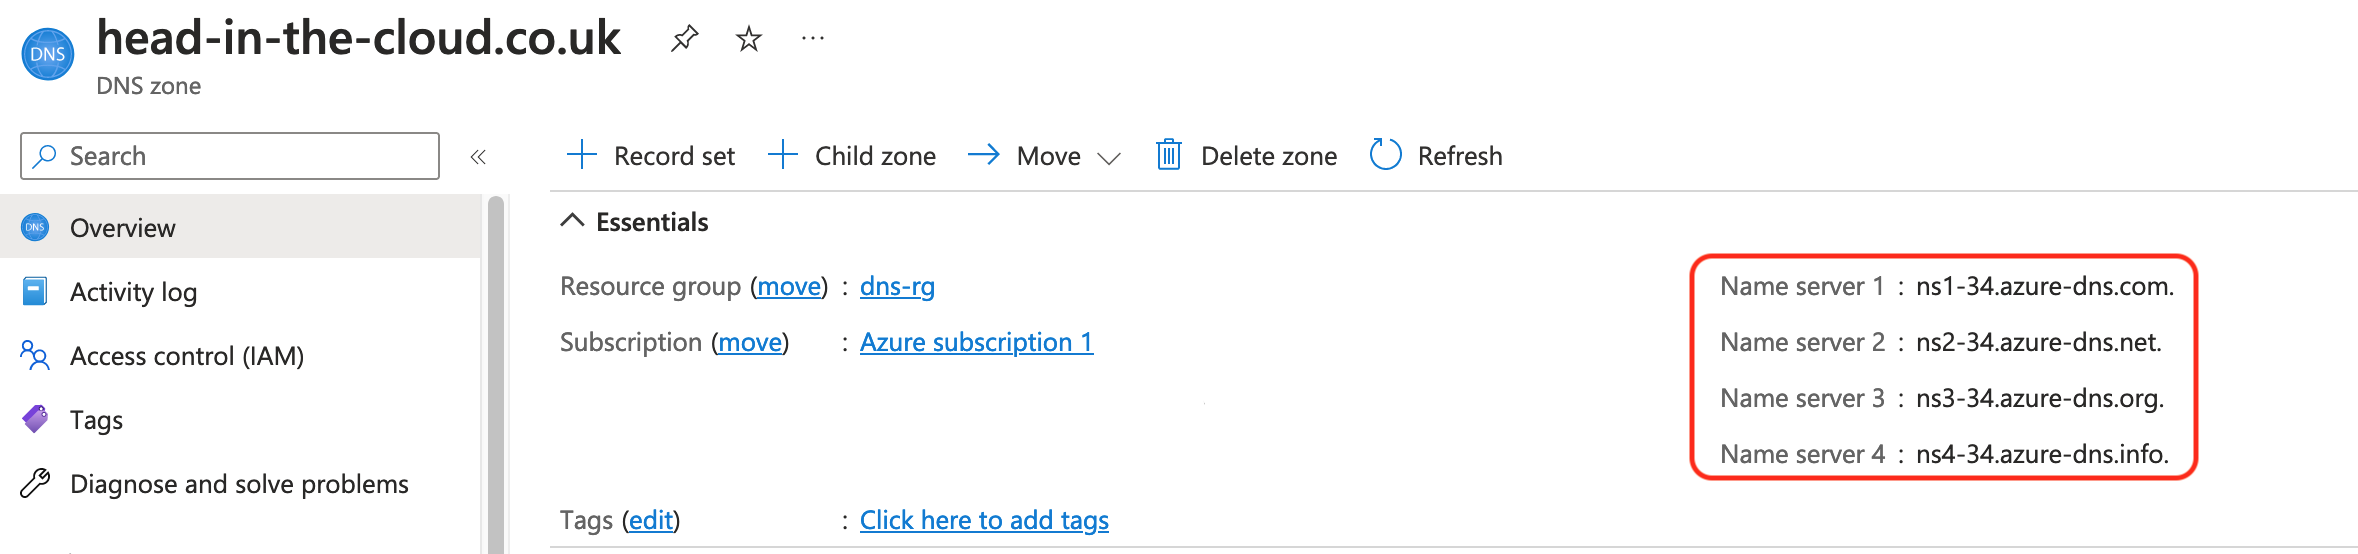
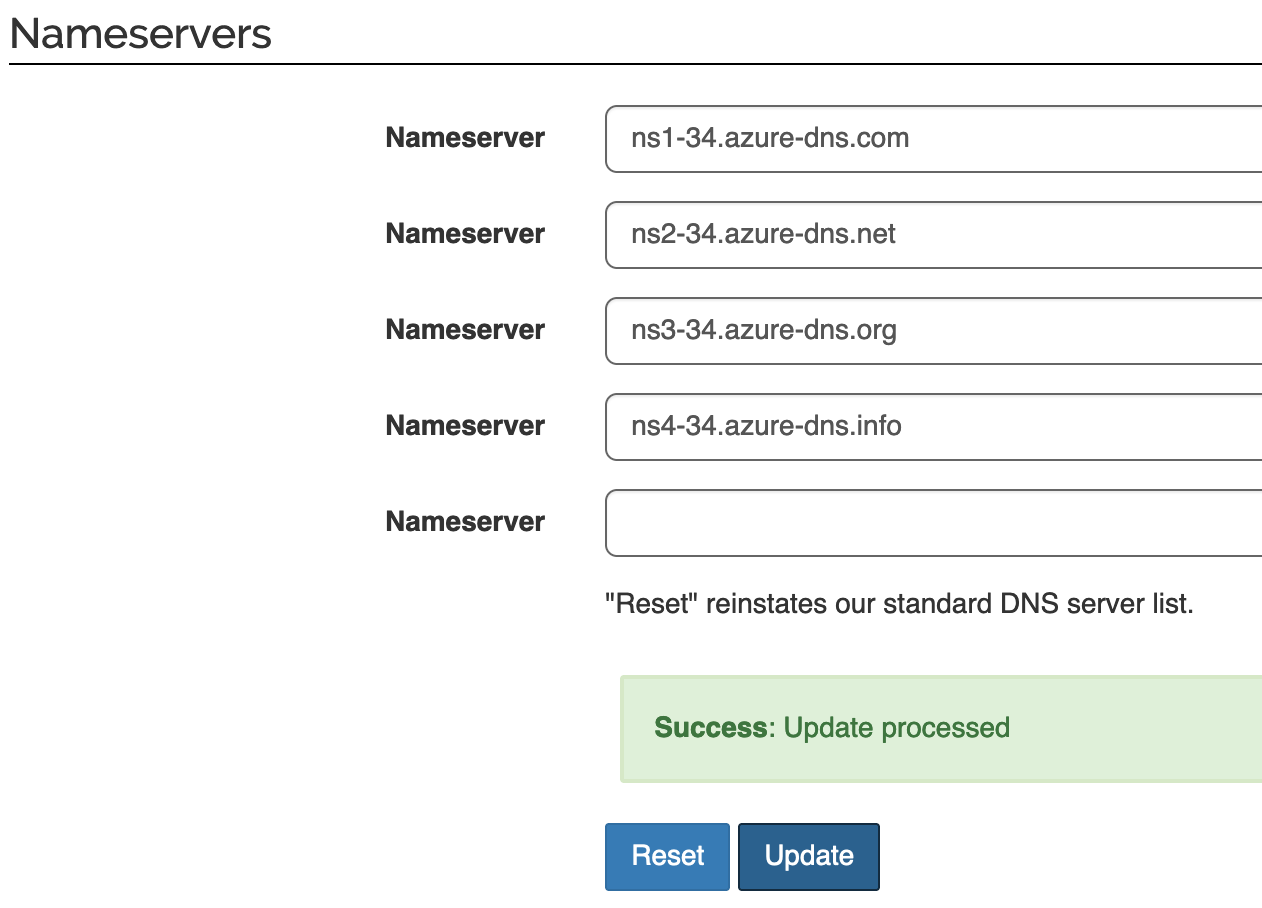
Log on to your domain name registrar and set these as the name servers for your domain:
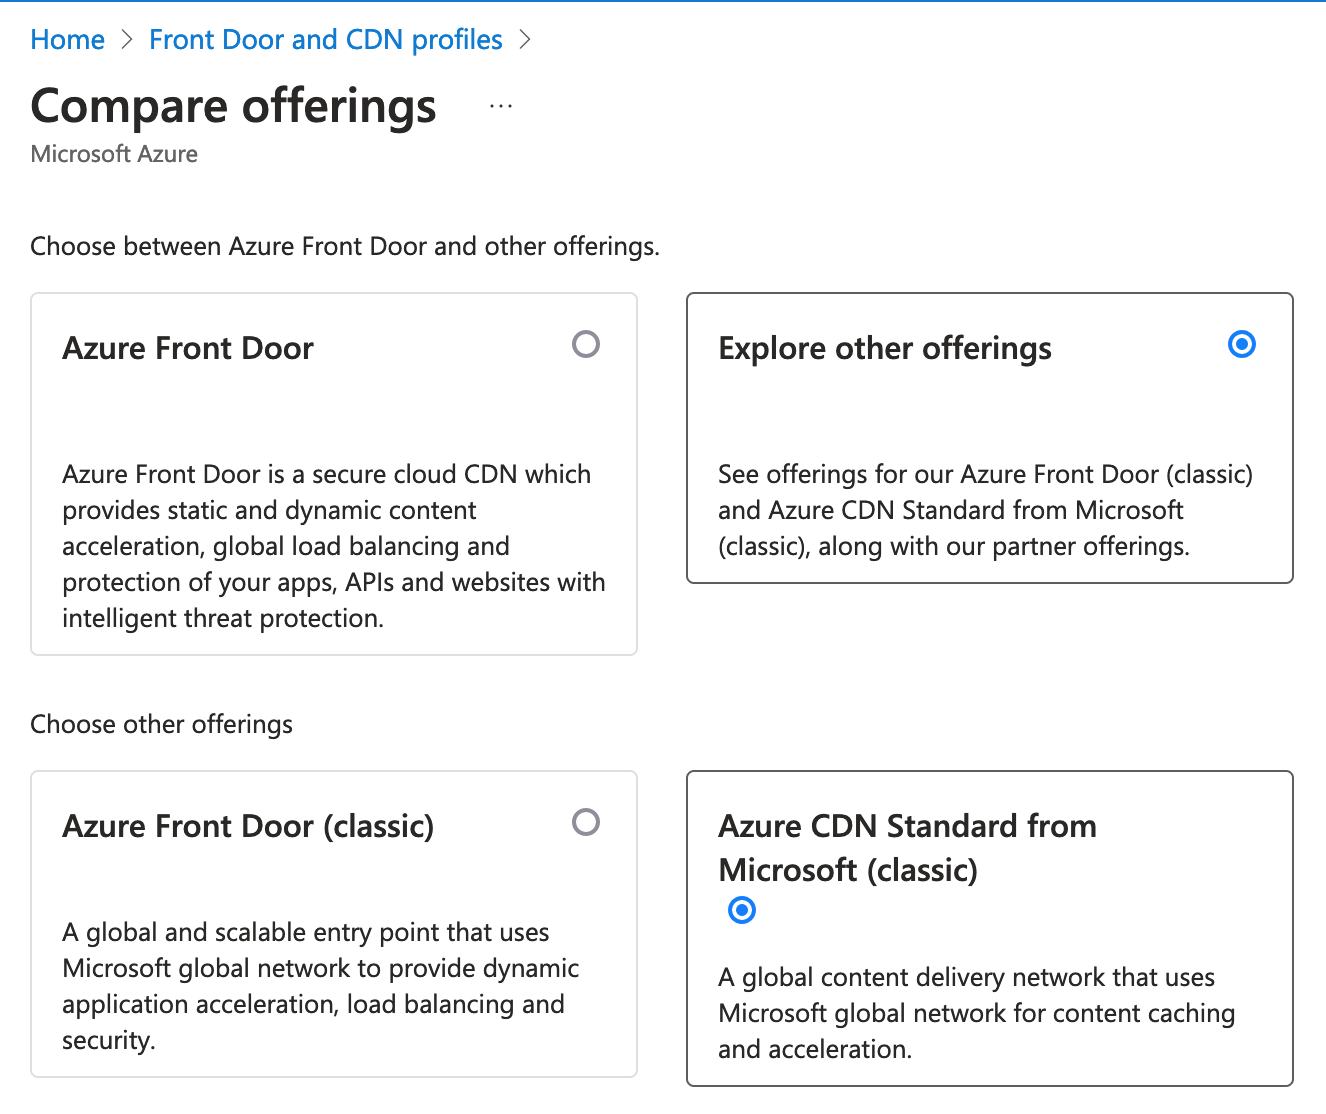
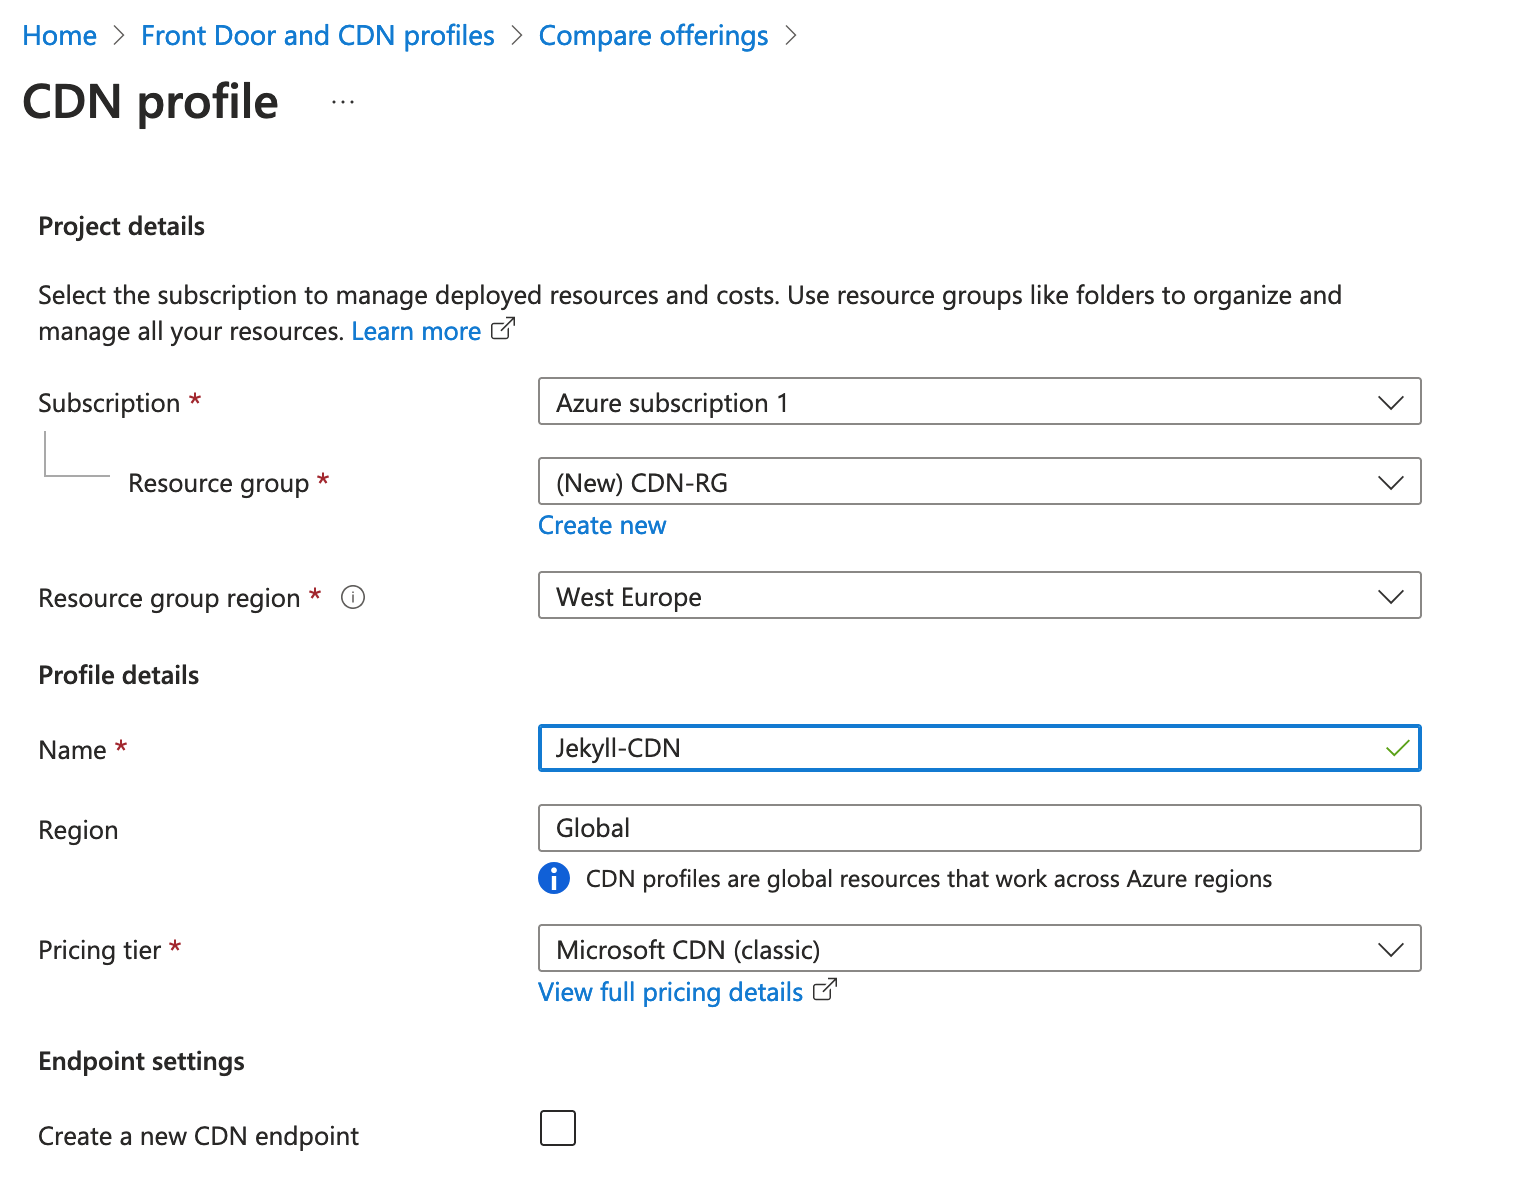
Back in the Azure portal, create a standard Microsoft CDN profile:
and fill in the details:
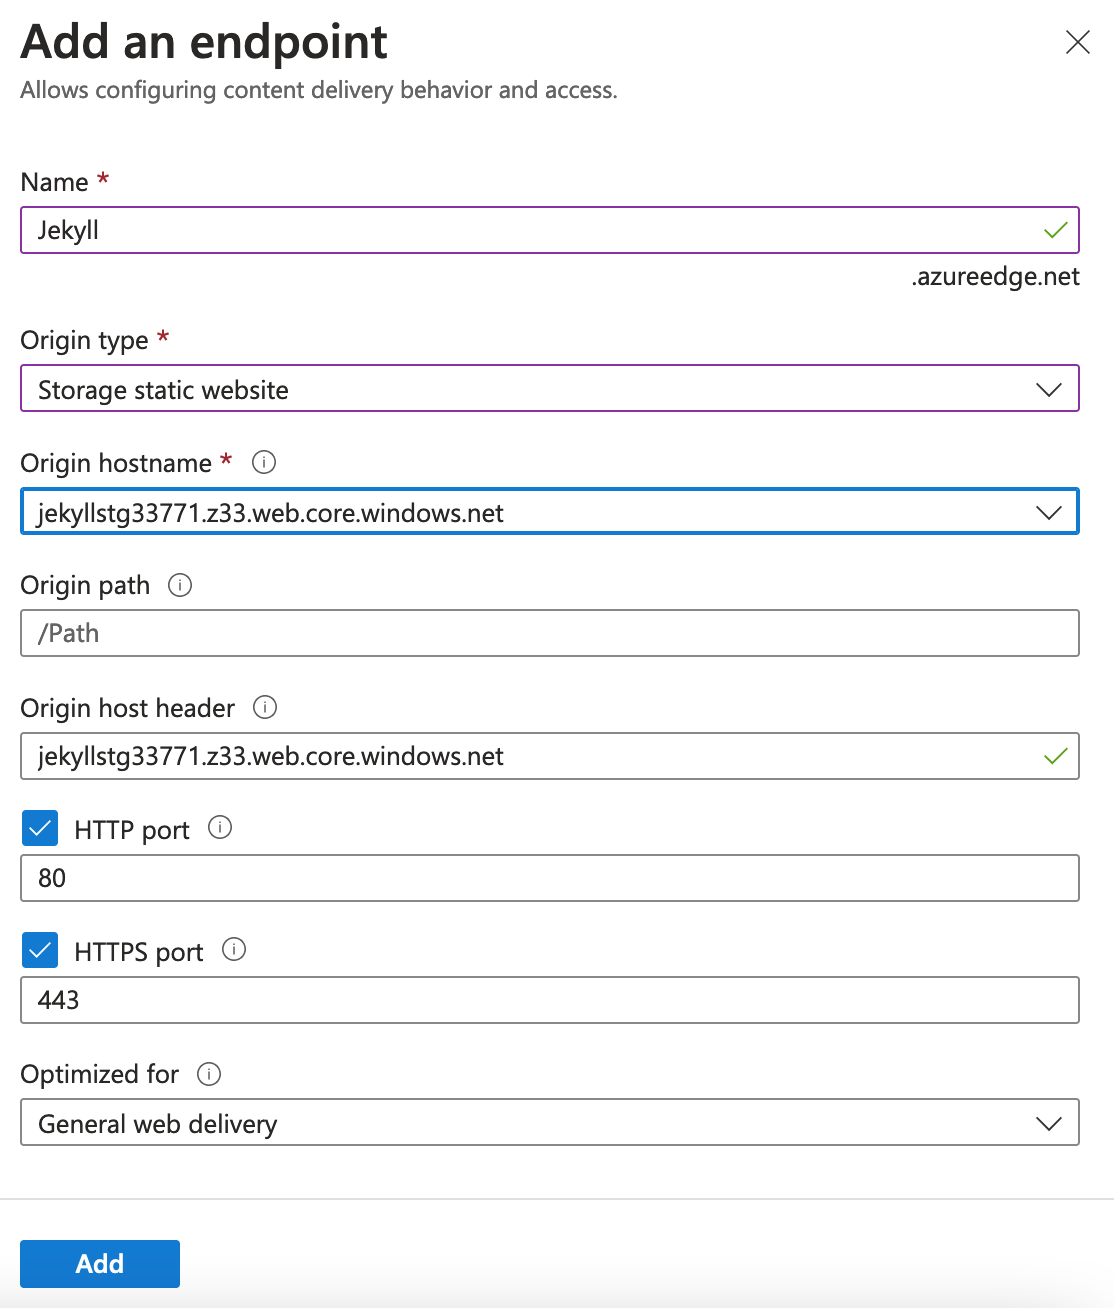
Once the CDN profile has been created, create an endpoint and set the origin hostname to your storage static website URL (use the dropdown menu):
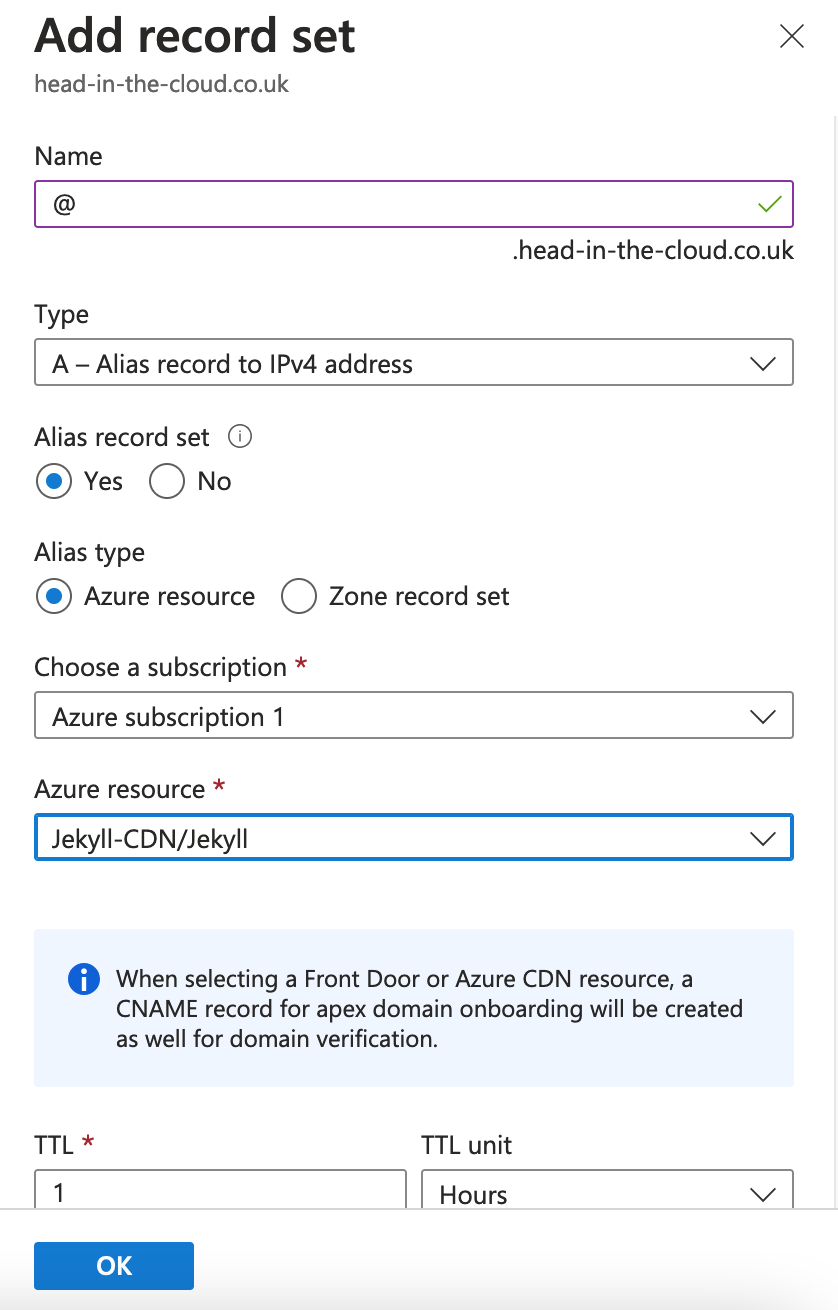
Now we add an A record to the DNS zone which points to the endpoint. Browse to DNS zone -> “+ Record set”.
Use @ for the record name and point the Alias record set to your Azure CDN endpoint. This will automatically add the CNAME that will be required later for domain verification:
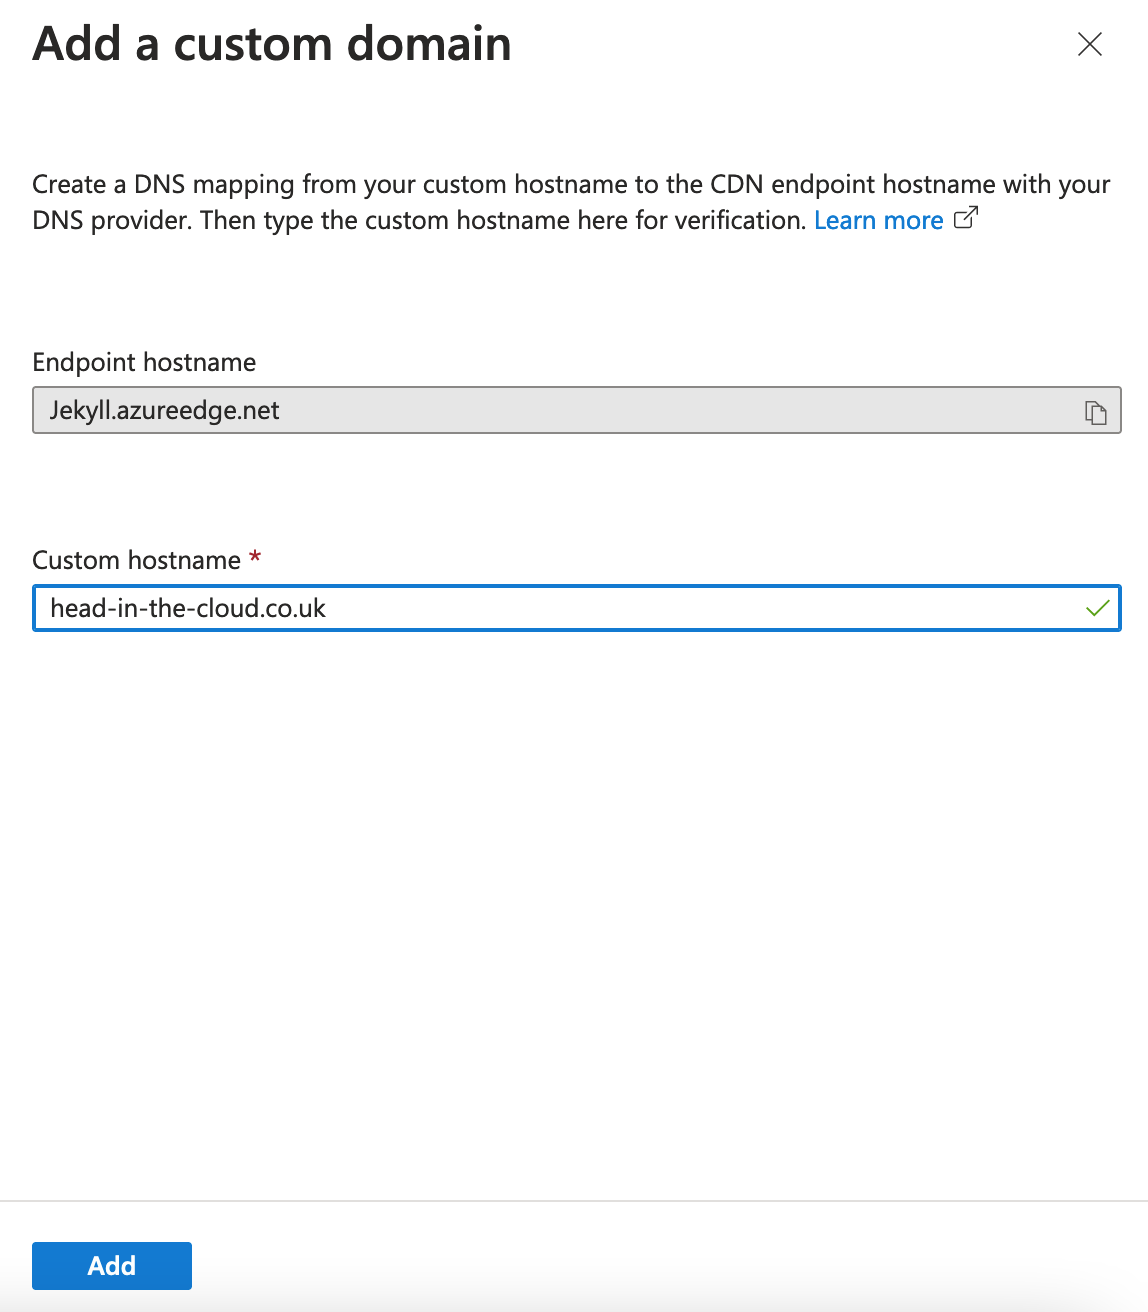
Now point the domain name to the endpoint. To do so, browse to the endpoint -> “+ Custom domain”.
Add your domain -> “Add”:
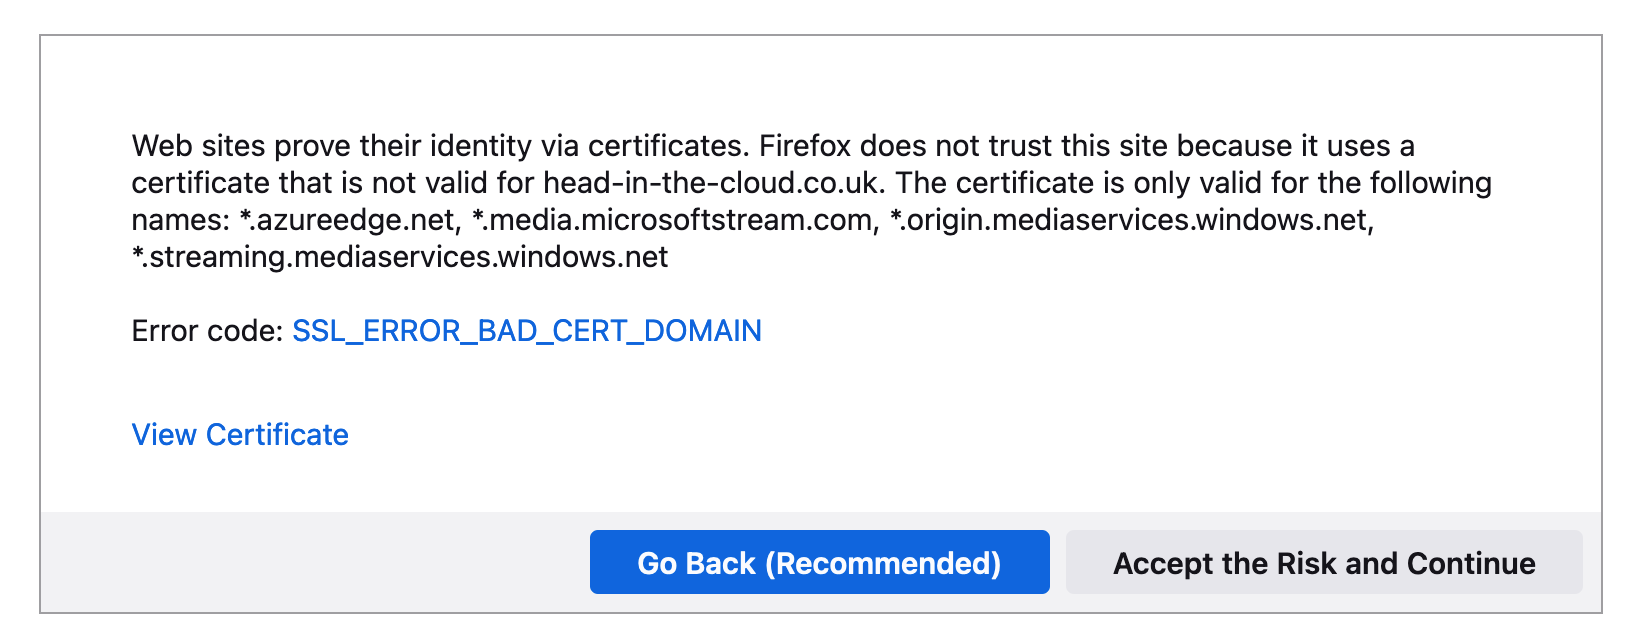
Now you can browse to the https version of your site but you will receive a certificate mismatch warning:
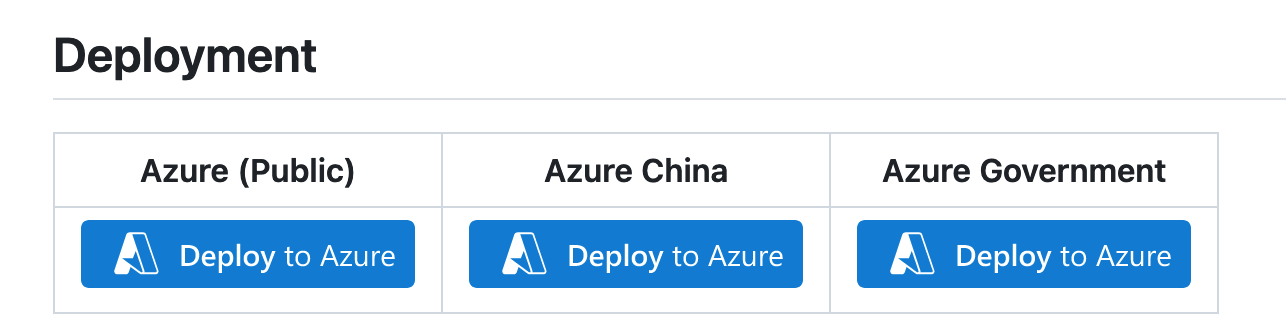
We can use Shibayan’s keyvault-acmebot to automate the process of requesting and renewing LetsEncrypt certs for the custom domain.
The GitHub page is here: Key Vault Acmebot
Scroll down and click on the “Deploy to Azure” button:
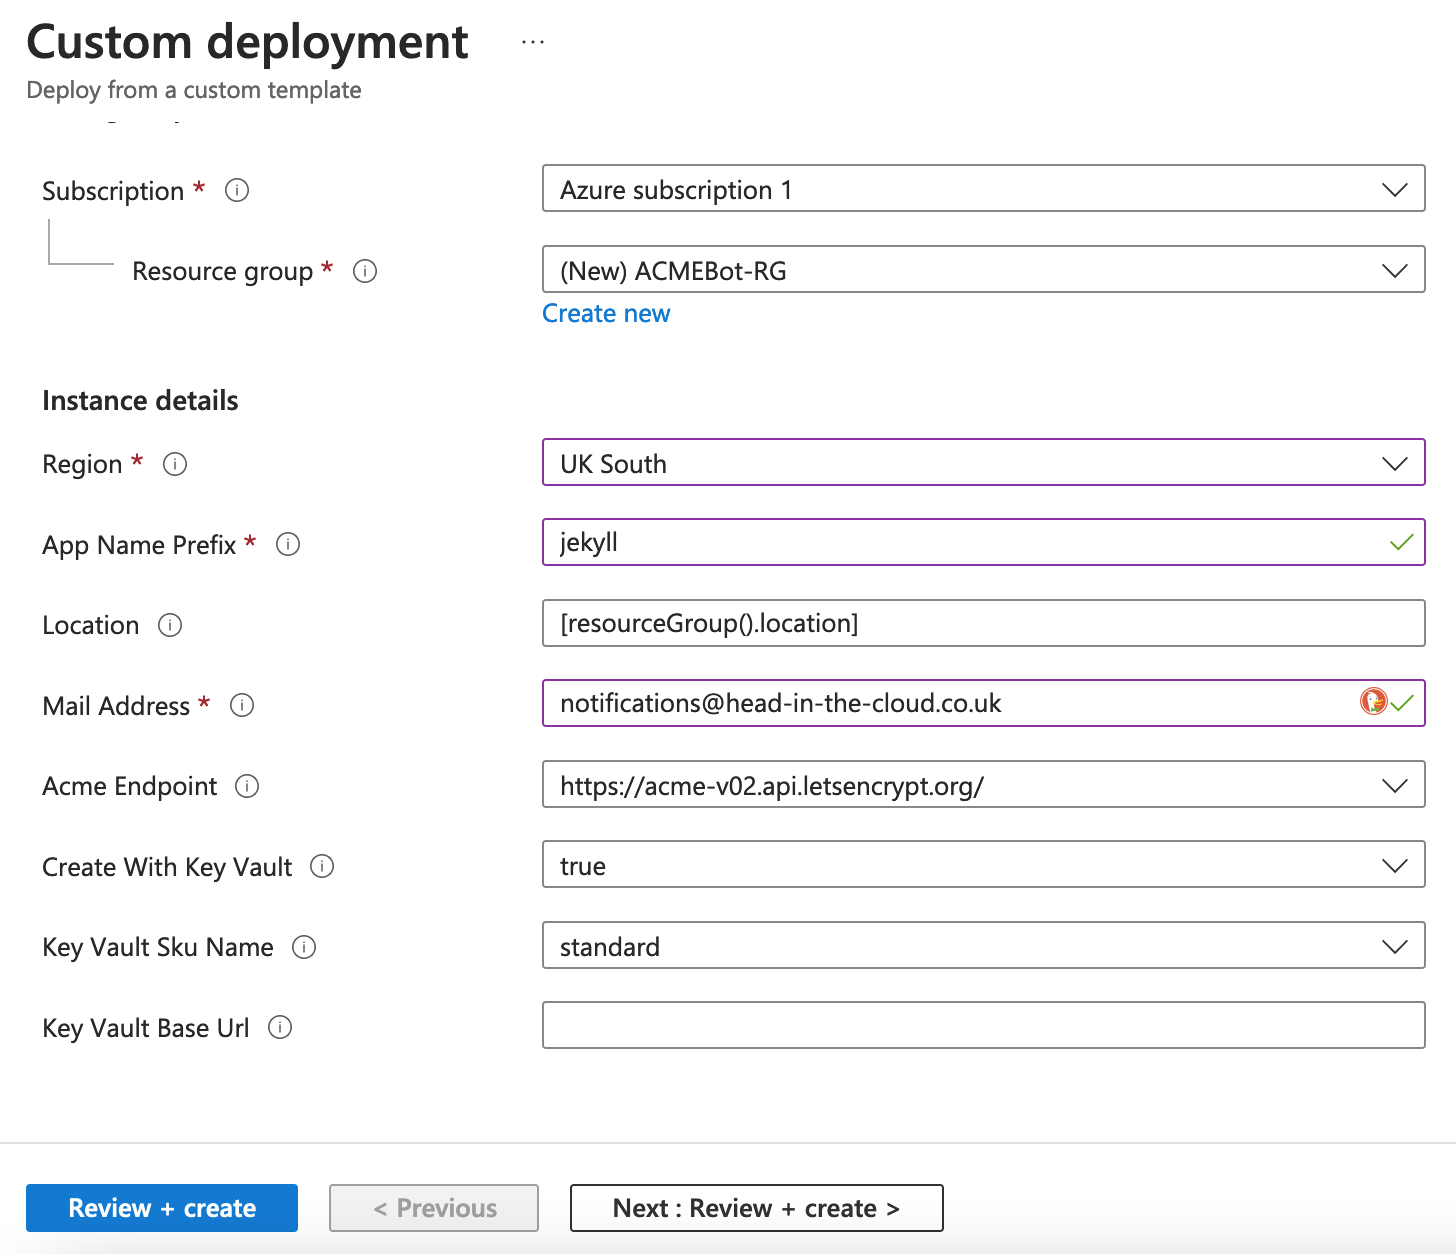
Choose, or create, a resource group, select your region, provide an app name prefix, and an email address for notifications:
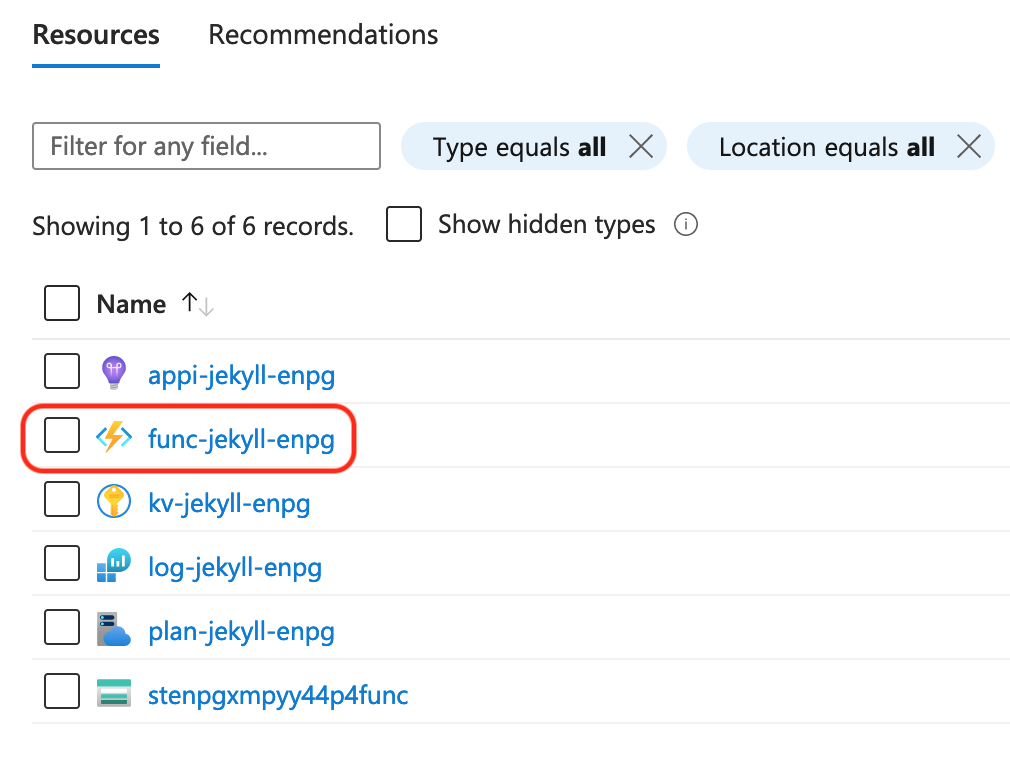
Once deployed, browse to the resource group and you’ll find a function app:
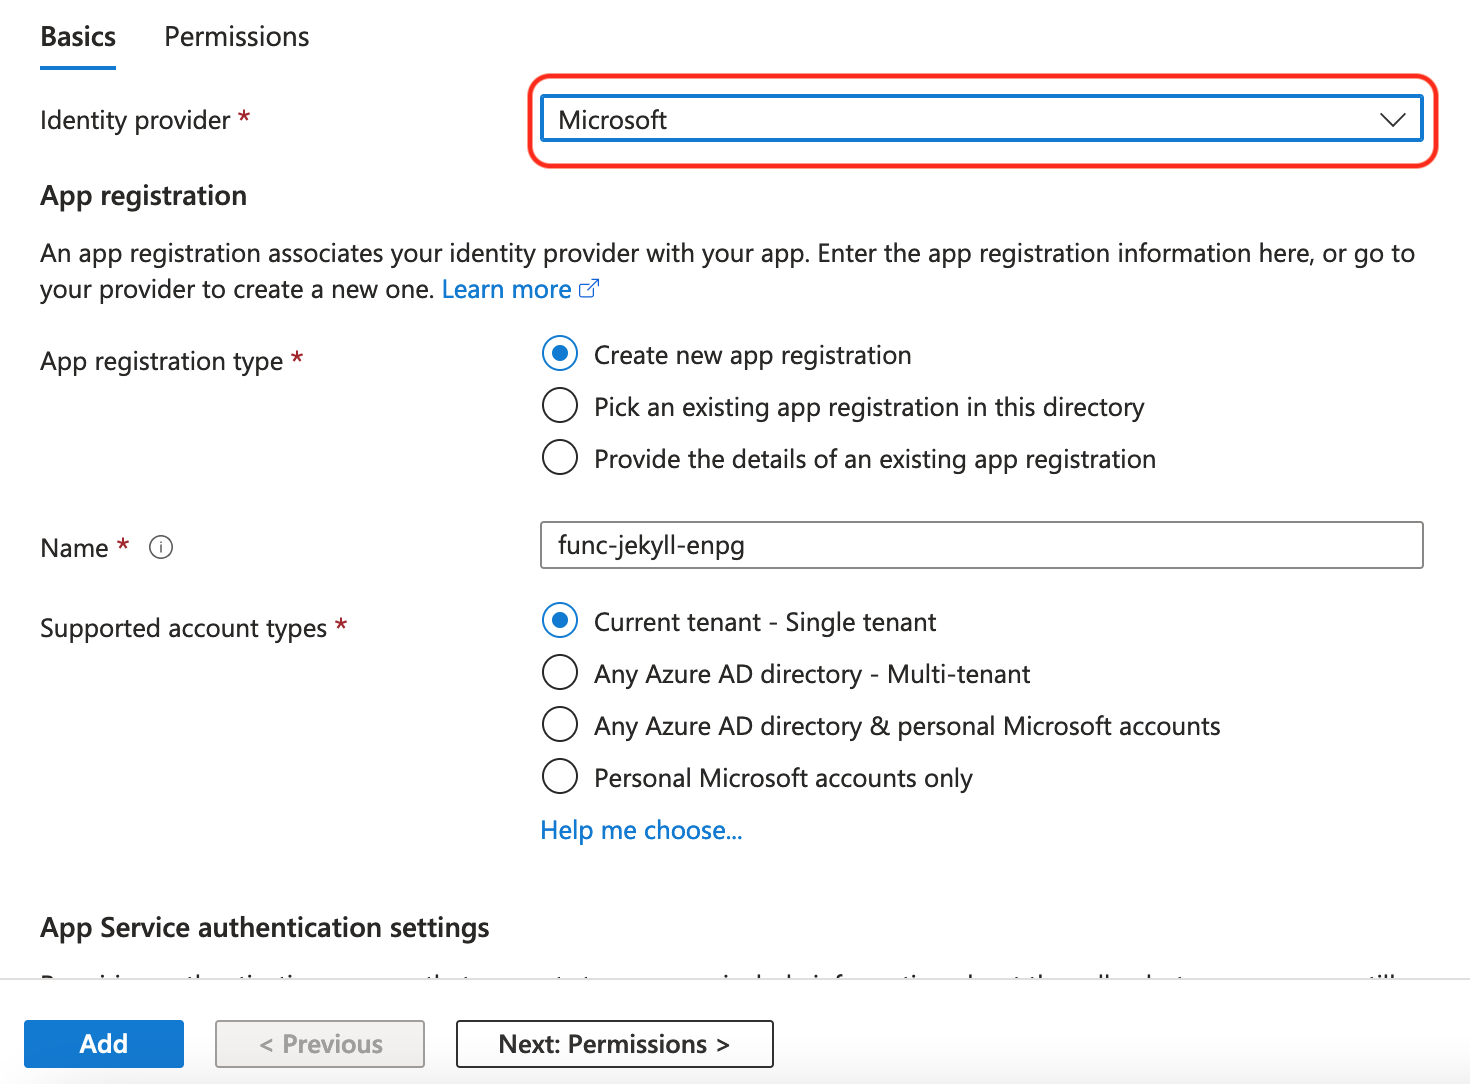
The first task is to configure the app to require authentication.
Browse to the function app -> Authentication -> Add an identity provider.
Select Microsoft and accept the defaults:
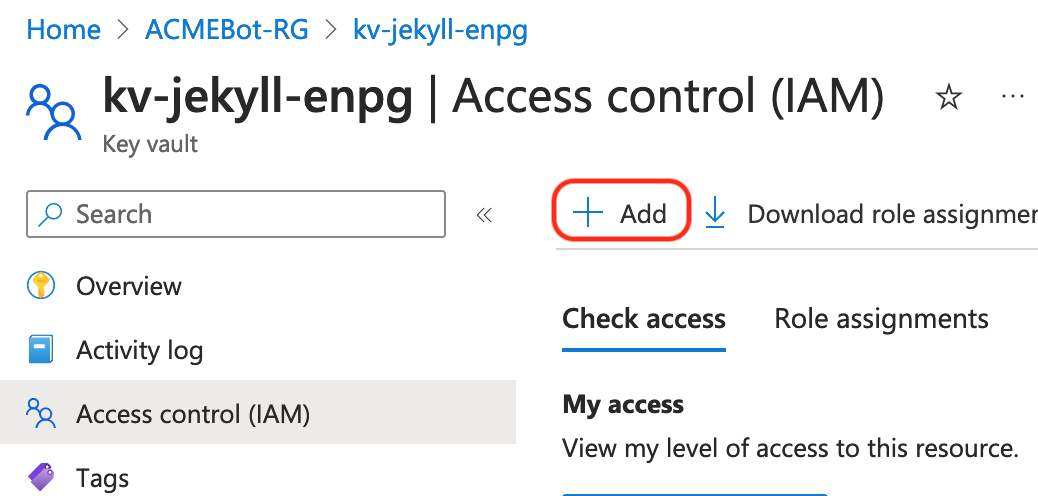
Now we can assign a role to the function app’s managed identity which will allow it to access the key vault certificates:
Browse to the key vault that was deployed -> Access Control (IAM) -> Add:
Add Role Assignment -> Assignment type -> Job function roles:
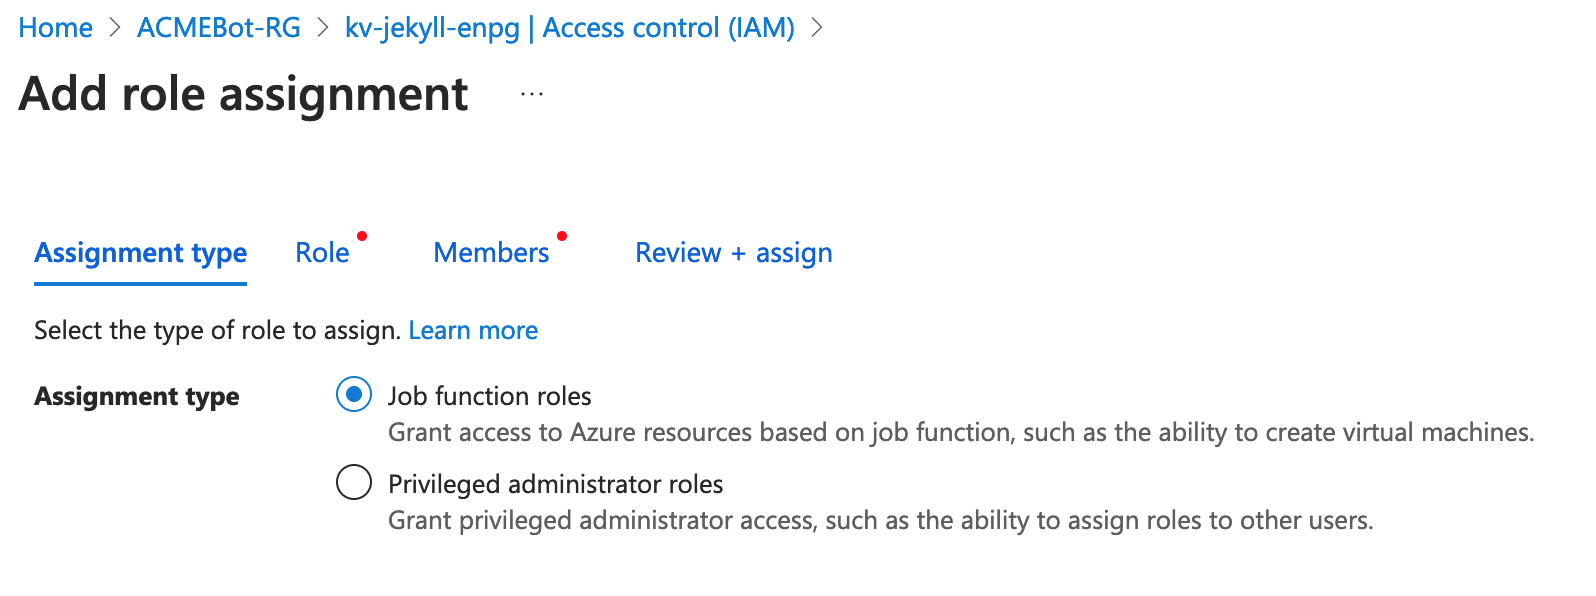
Choose “Key Vault Certificates Officer” and select the function app’s managed identity:
Click “Select” then “Review + Assign”.
While in the access control settings for the key vault, there are two more perms to assign:
- assign the “Key Vault Admin” role to your account
- assign the “Key Vault Secrets User” role to Microsoft.AzureFrontDoor-Cdn
This will allow you to access the certs and allow the CDN profile to update the custom domain of the endpoint.
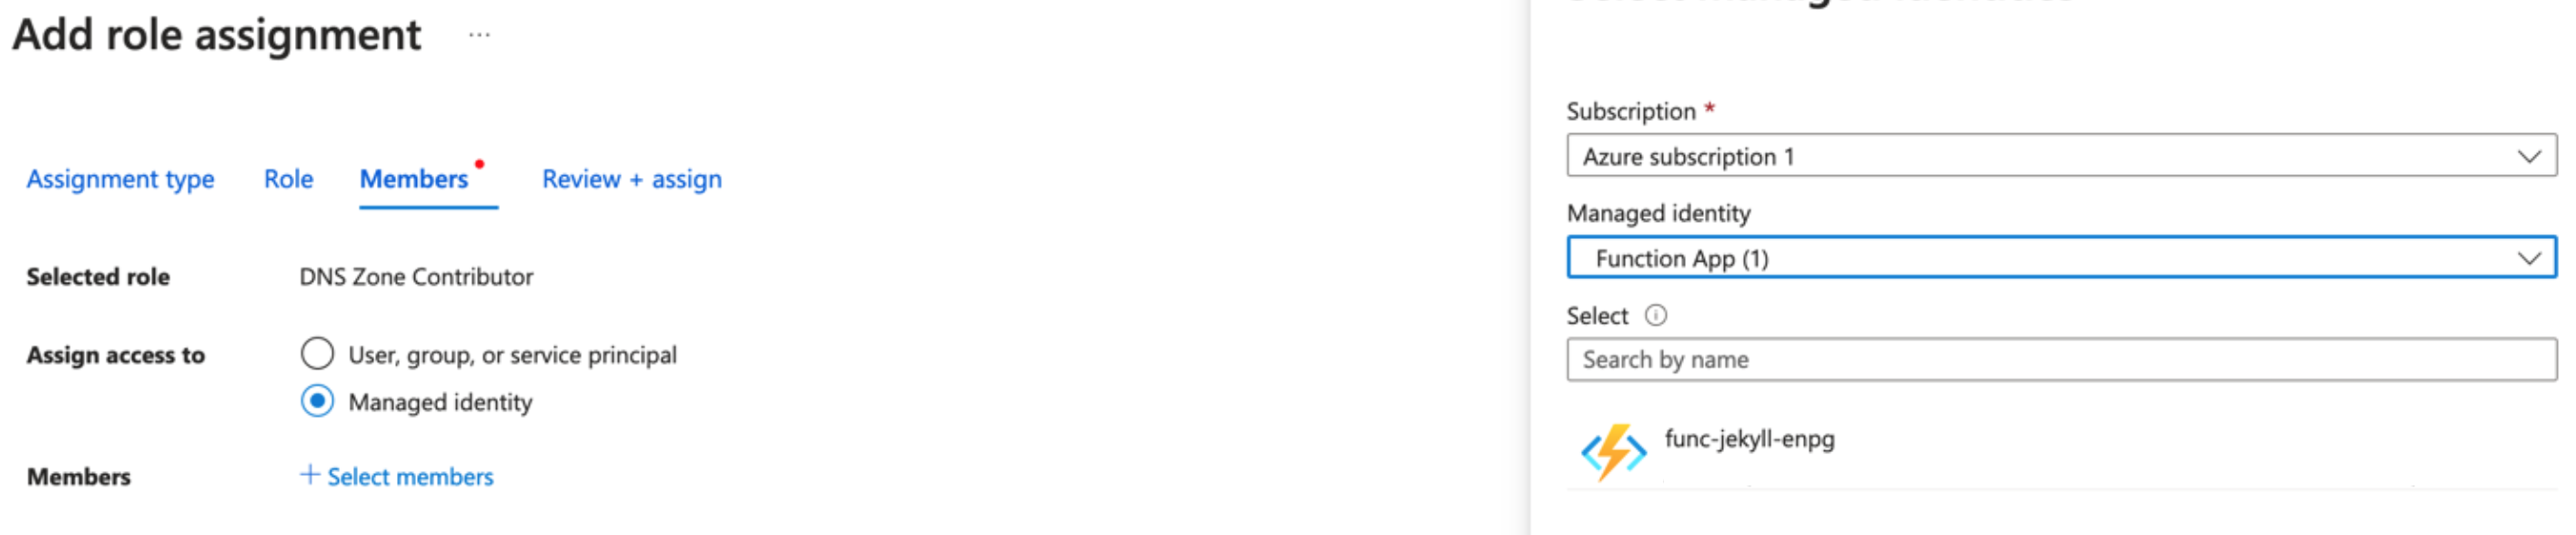
We also need to grant the “DNS Zone Contributor” role to the function app. This is so the app can create the verification DNS records that LetsEncrypt request.
Browse to your DNS zone -> “Access control (IAM)” -> Add -> Add Role Assignment:
Job function roles -> DNS Zone Contributor”
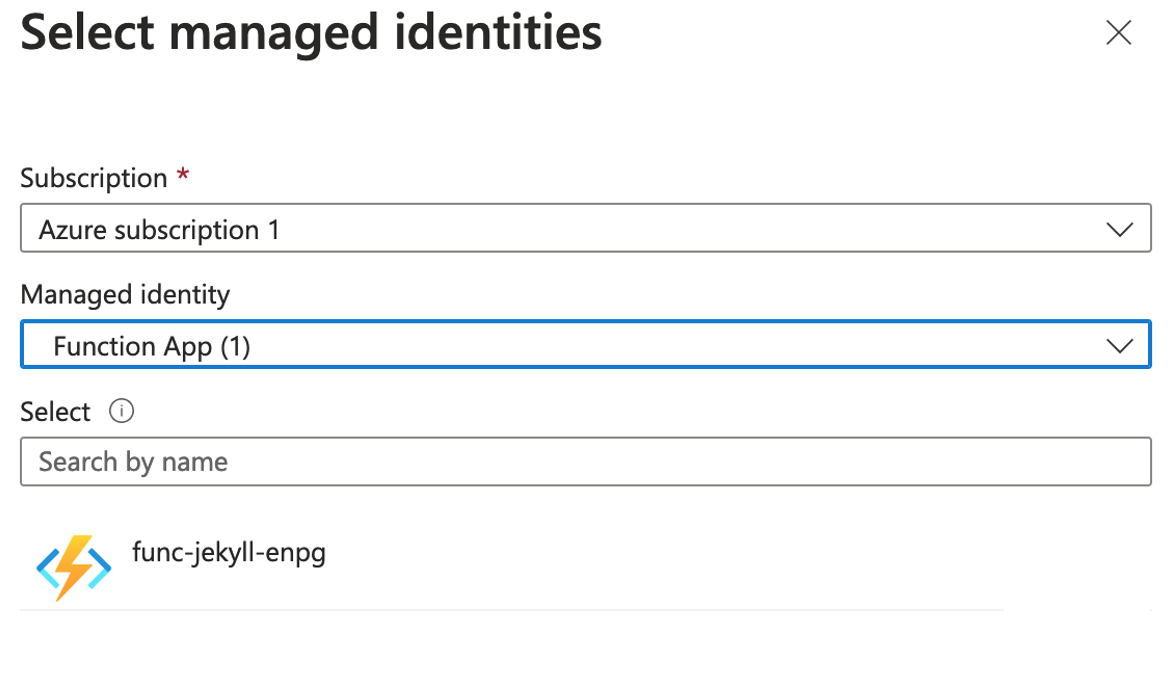
Choose “Managed Identity” -> Select your function app -> Select -> Review & assign
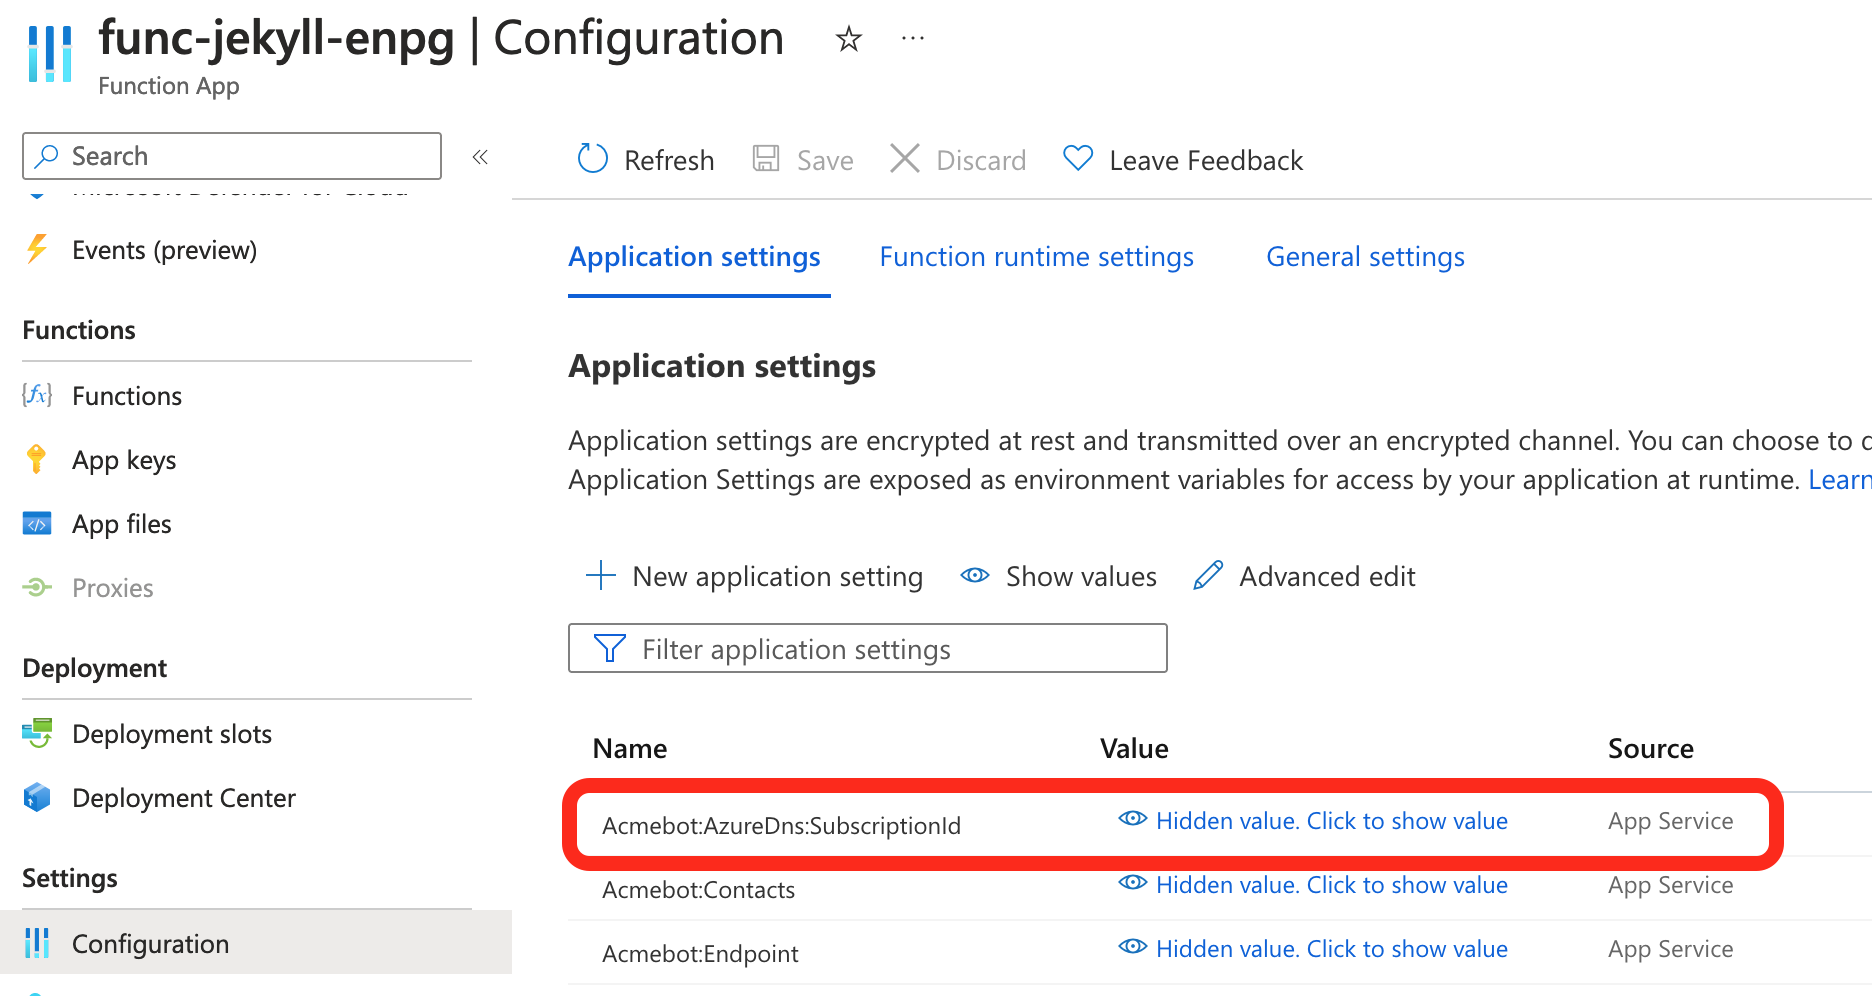
Now add the following Application Setting to you function app configuration:
Acmebot:AzureDns:SubscriptionId and set the value to your subscription ID.
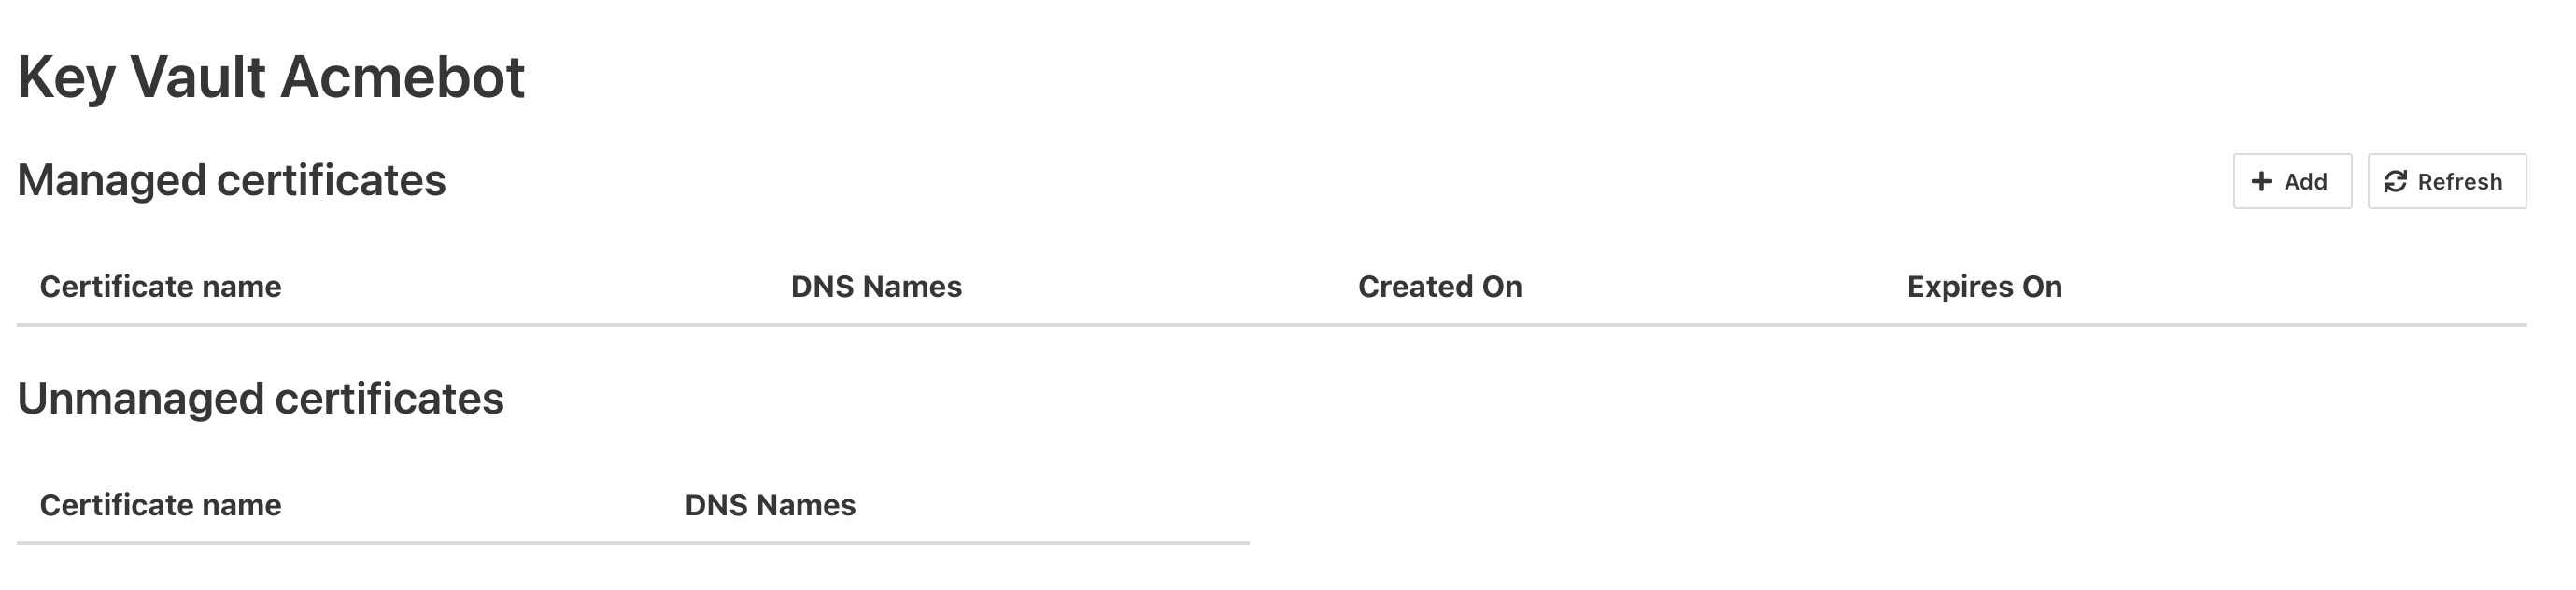
Now we can browse to the function app URL + “/dashboard”
and you should see:
Click on “Add”, select your DNS zone in the drop-down, leave the DNS Names text box empty and click “Add” to request a wildcard cert:
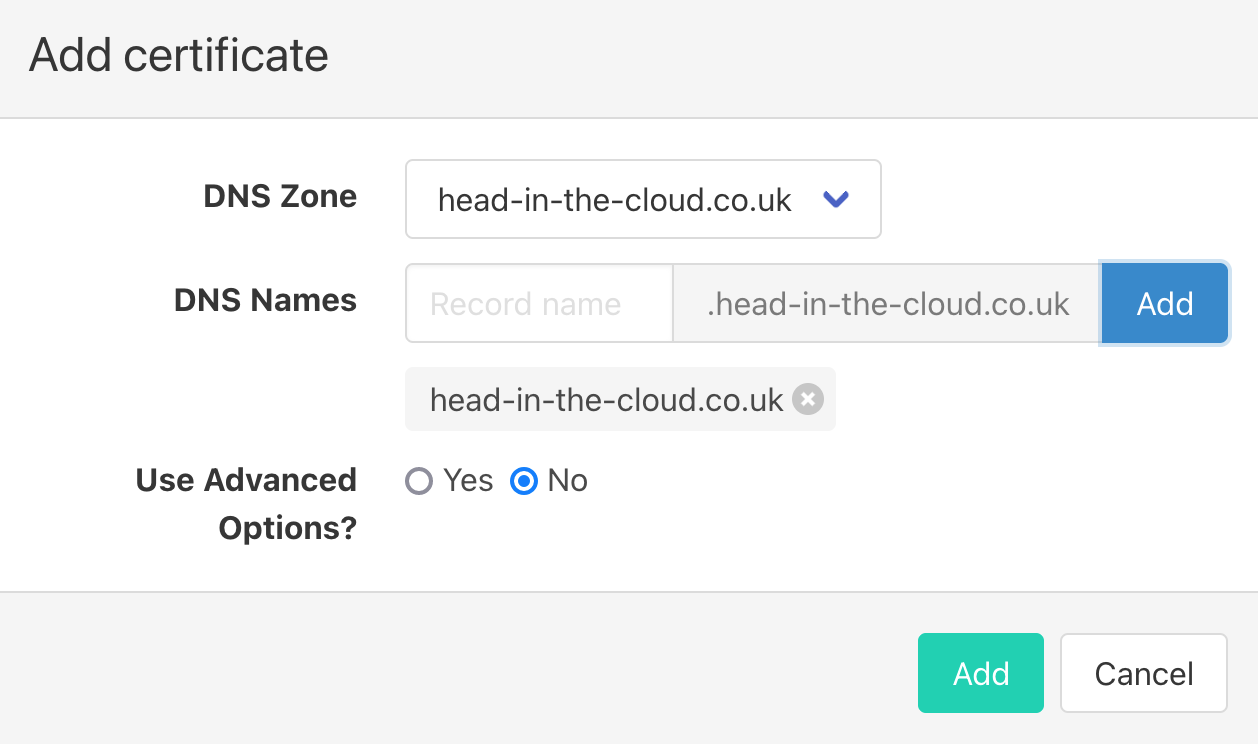
Click the green “Add” button and wait for the success message:
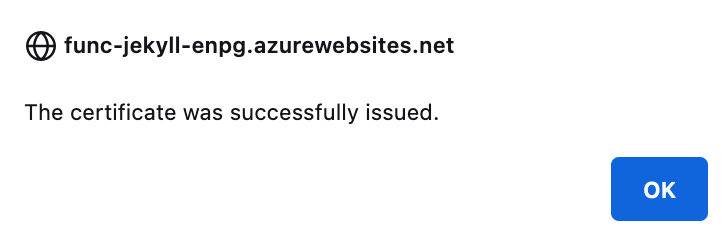
You will see the certificate listed in the dashboard:

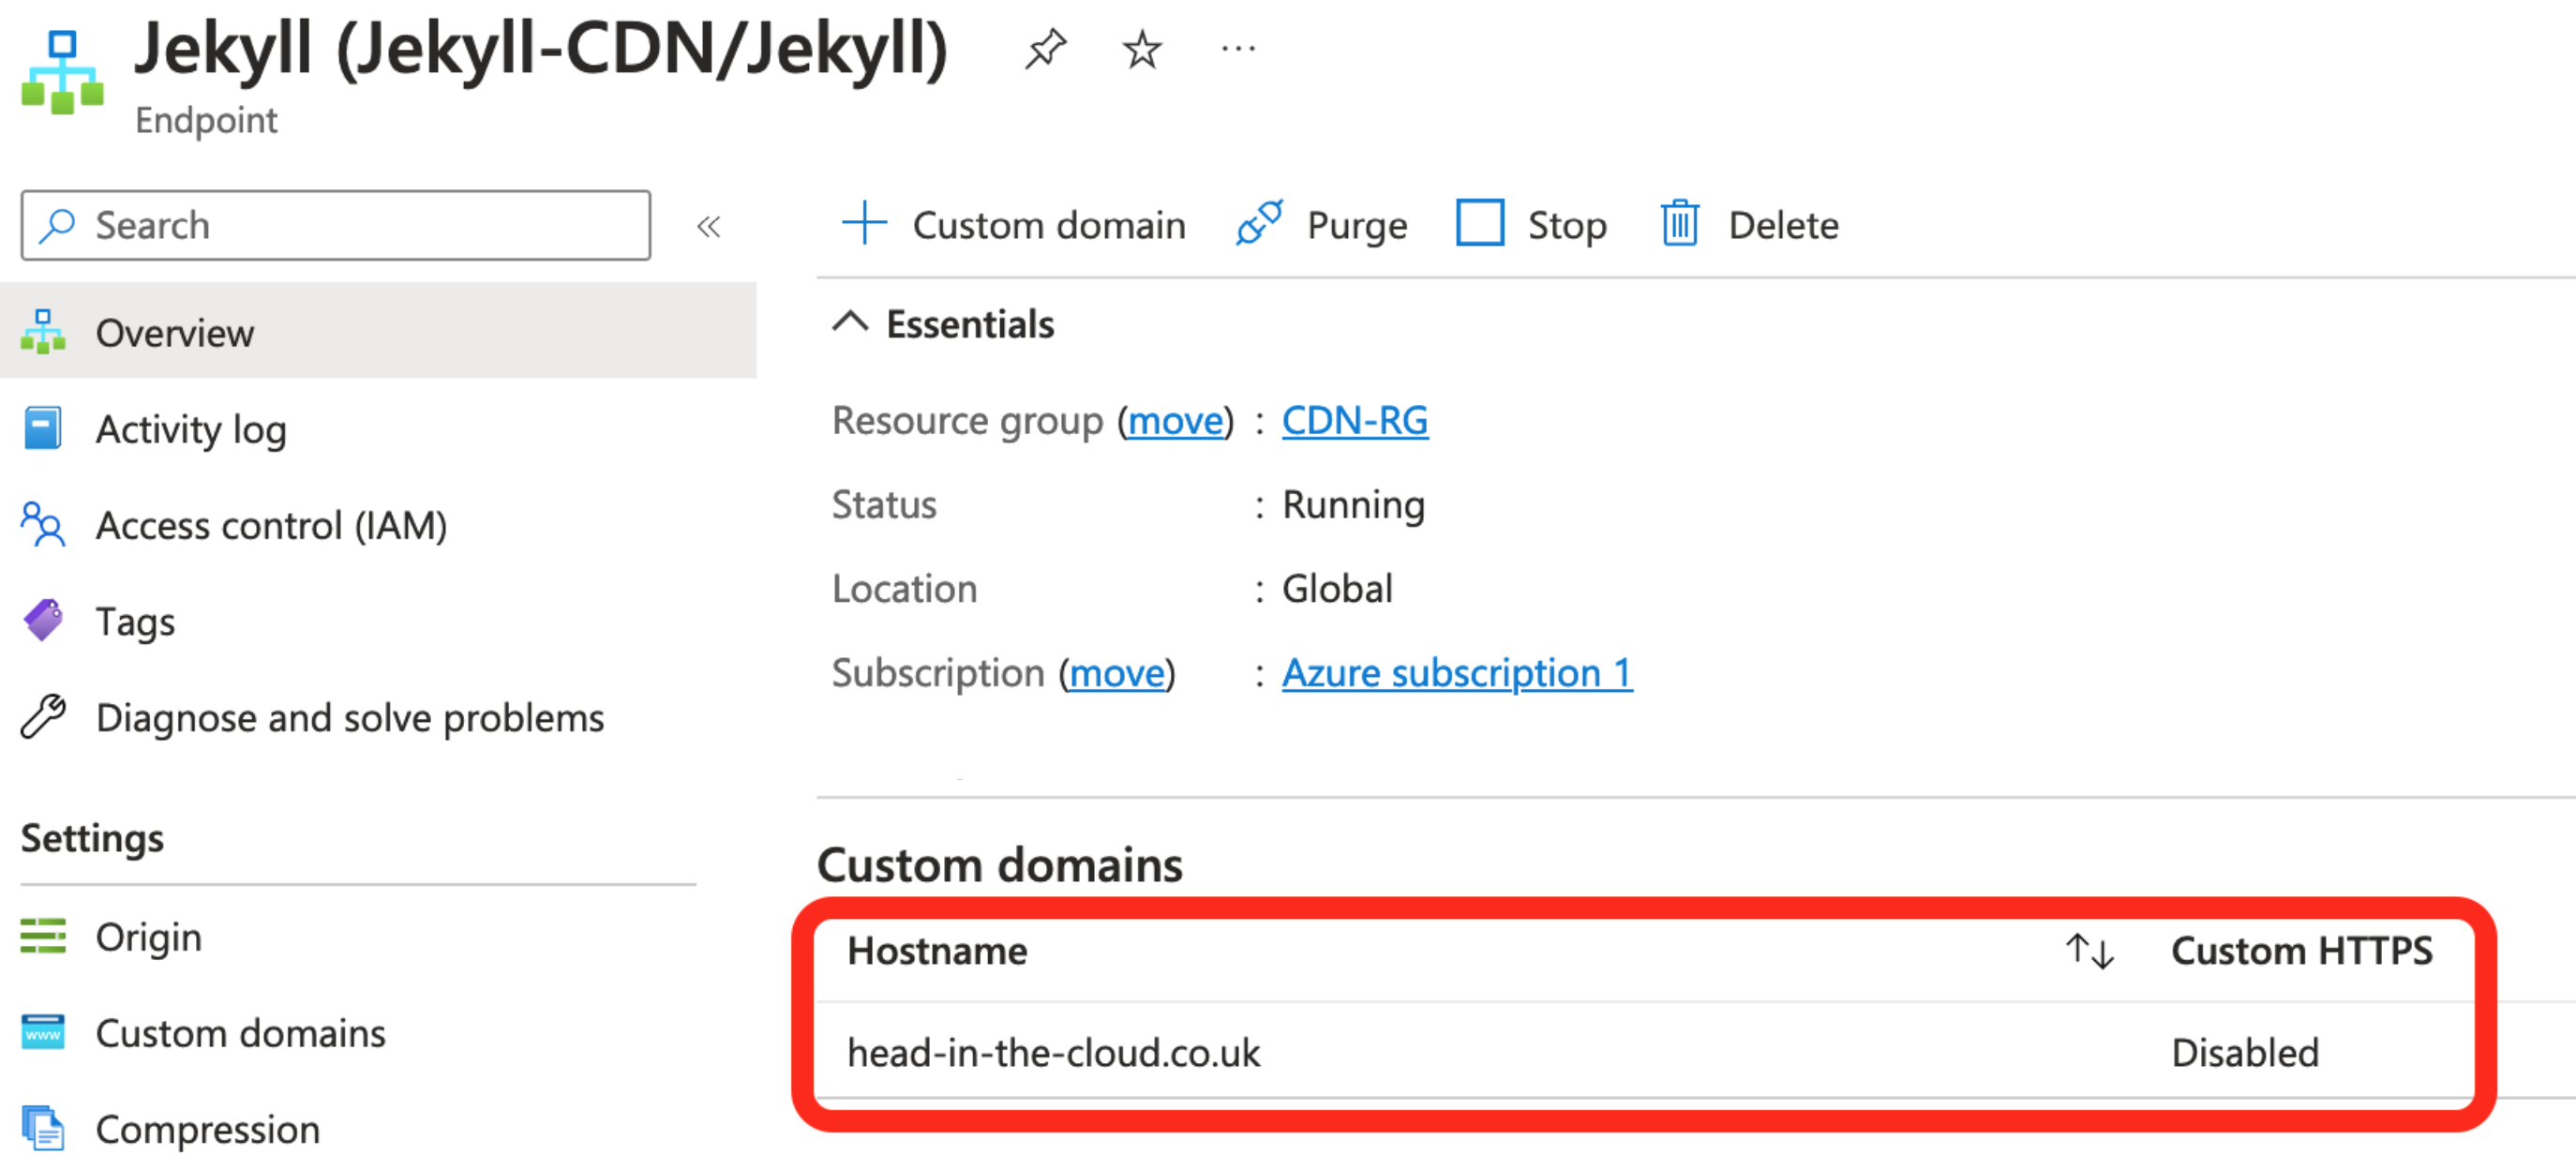
Now we can add the certificate to the CDN endpoint.
Browse to the endpoint and select your custom domain hostname:
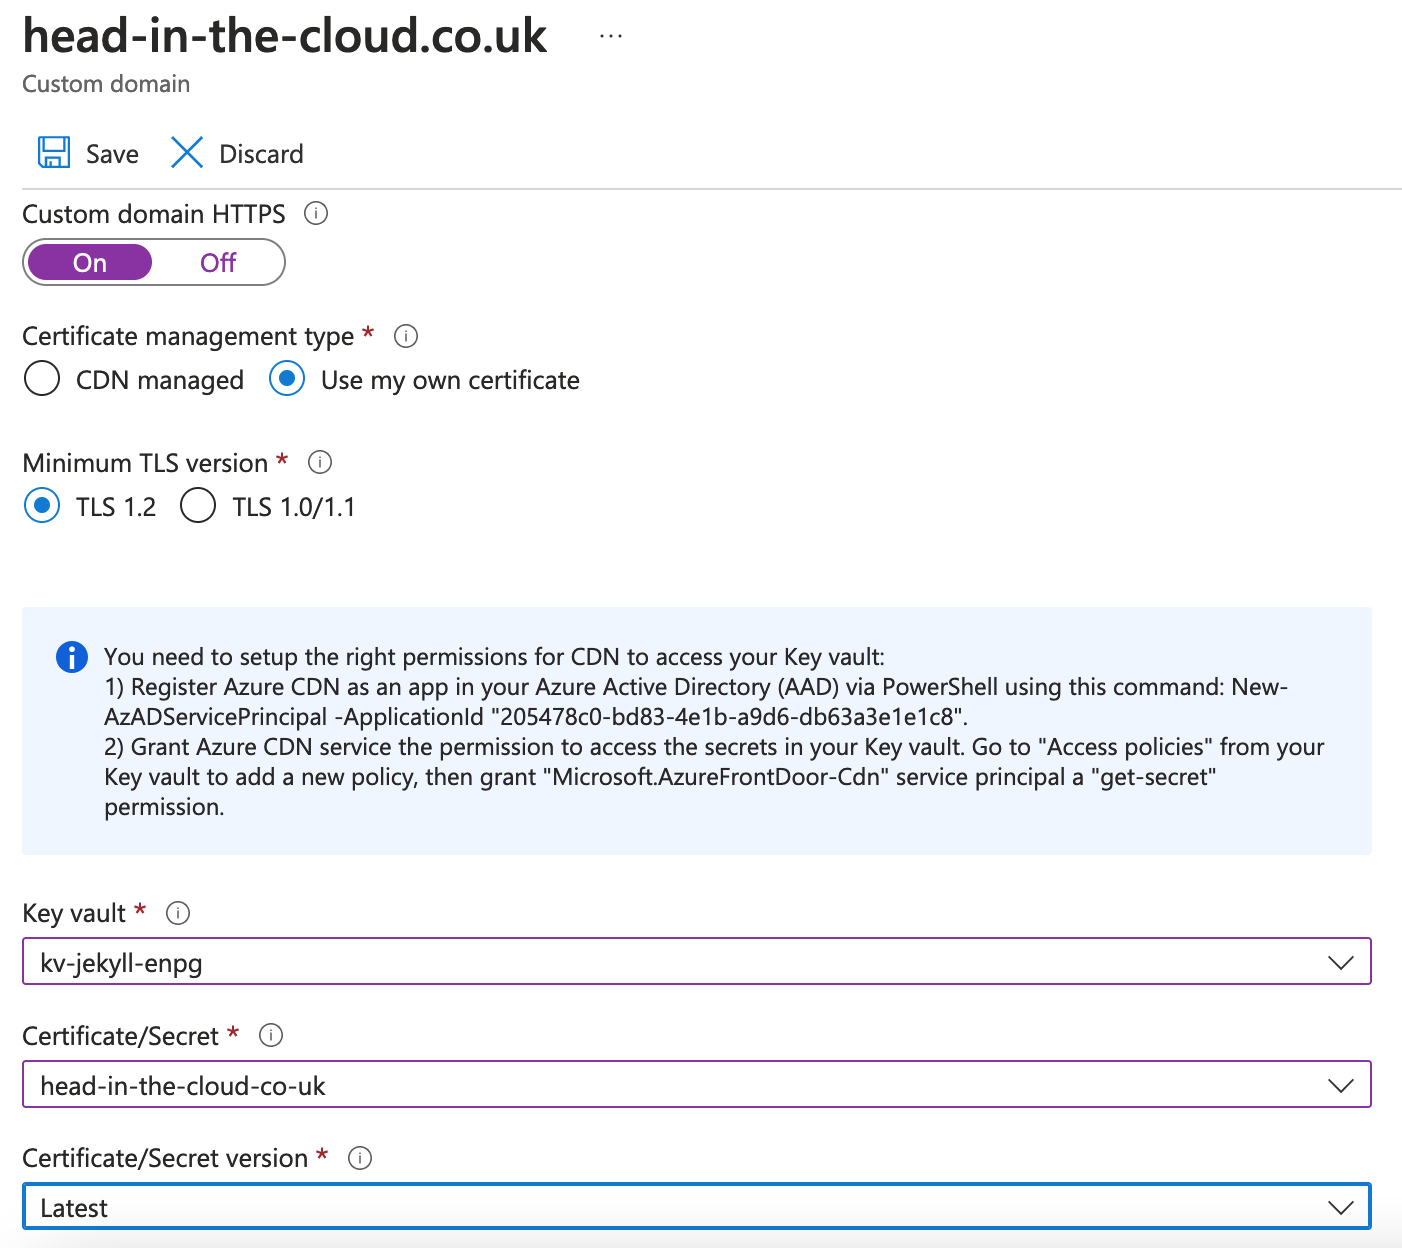
Turn on Custom domain HTTPS, select “Use my own certificate”, choose your key vault, certificate and version then save:
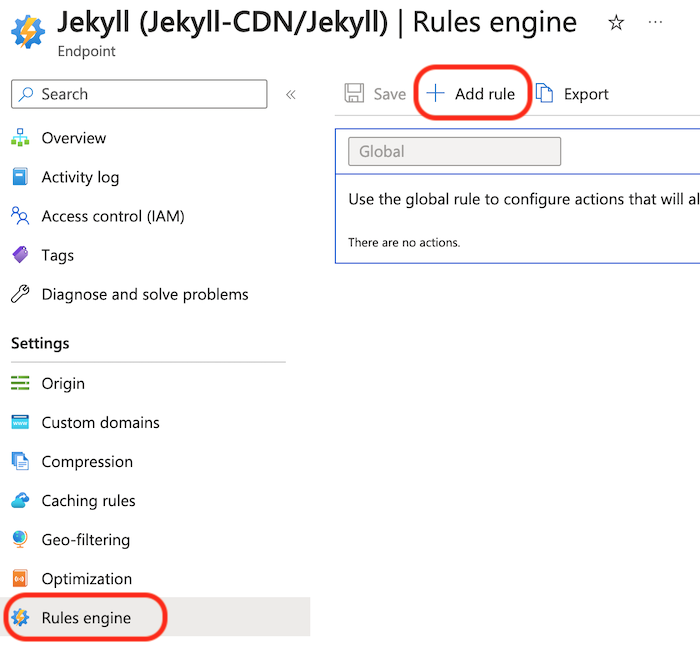
Finally, we need to create a rule to redirect any http requests to https.
Browse to your endpoint -> Rules Engine -> “+ Add rule”:
Give the rule a name then add a Request Protocol condition and a URL Redirect Action:
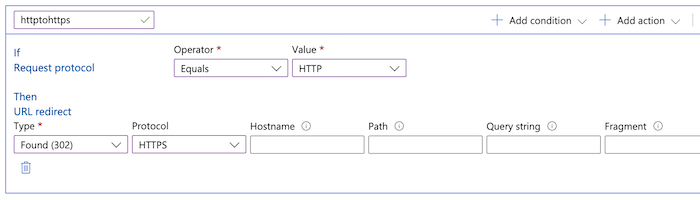
Save the rule.
Now you have a secure site, served via Azure storage, and locally editable with automated build and release pipelines.